How to Register
In order to register for classes, you must create a "household profile" (for more than one student enrolling within your family) or "student profile" (if only one student is enrolling). You only need to create your familiy or student
profile once; after it is created you can sign in using your username and password
and register for classes. A profile also allows you to view your transactions, current
or past registrations, transcripts, and register for classes each semester.
1) Click on  on the menu bar to the left.
2) From Sign In page, click create new student or household profile.
3) Select Create a Student Profile (single user).
4) Click Submit
5) Enter your Username (we recommend using your first initial and last name as your
username).
6) Enter your Password; re-enter your Password (Note: *minimum 8, maximum 255 characters)
7) Enter all required information on the next 2 pages: name, address, city, state,
zip, phone, email, date of birth, etc. (Note: *denotes required information)
8) When you have completed your student profile, click Submit.
9) You will receive a confirmation via email.
10) After submitting this page, you are returned to the courses page to begin your
registration.
Note: Secure your username & password in a safe place for access at a later date.
How to Register for Classes
Step One: Sign in
1) Click on "Sign In" on the menu bar to the left and follow the prompts.
2) After you sign in, you will notice additional menu options that will allow you
to edit your profile, check your current registrations, and view your transaction.
Step Two: Locate the classes that interest you
1) To browse all course categories and subcategories, click "Browse – All Classes."
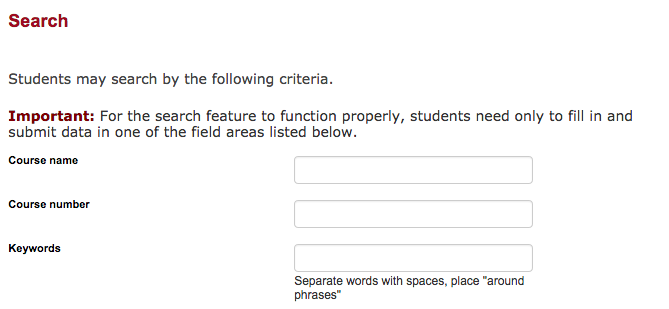
2) From the All Classes page, locate preferred Category/Subcategory. OR, To find a specific class, click "Search" or use the "search for a class..." box under the top banner. Enter information into one (or two) of the requested fields. OR
OR 
![]()
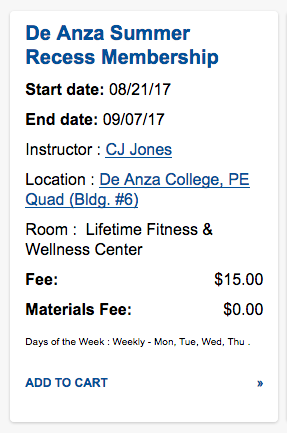
- Click on the class title (in bold) to see a full course description. Click on the instructor's name to see a short professional bio.
Step Three: Begin the registration process, add classes to your "Cart" and "Checkout"
1) To select a class for registration, click "Add to Cart."
2) If instead of a button, the word "Closed" appears, it means online registration is unavailable because the class is full OR
is unavailable due to special enrollment requirements. A phone number in that space
indicates that you should call that number for more information.
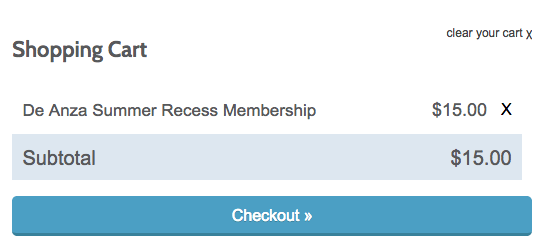
3) When you are done "shopping" for classes, click the button at the top of the page on right side of the screen.
4) When class or classes added to shopping cart; options available:
• Choose Additional Classes
• Edit Cart
• Checkout
- From Shopping Cart page:
• click Refund Policy link
• carefully review the refund policy
• click checkbox(s)
• enter corresponding “codes” (if applicable)
• lastly, click "Checkout"
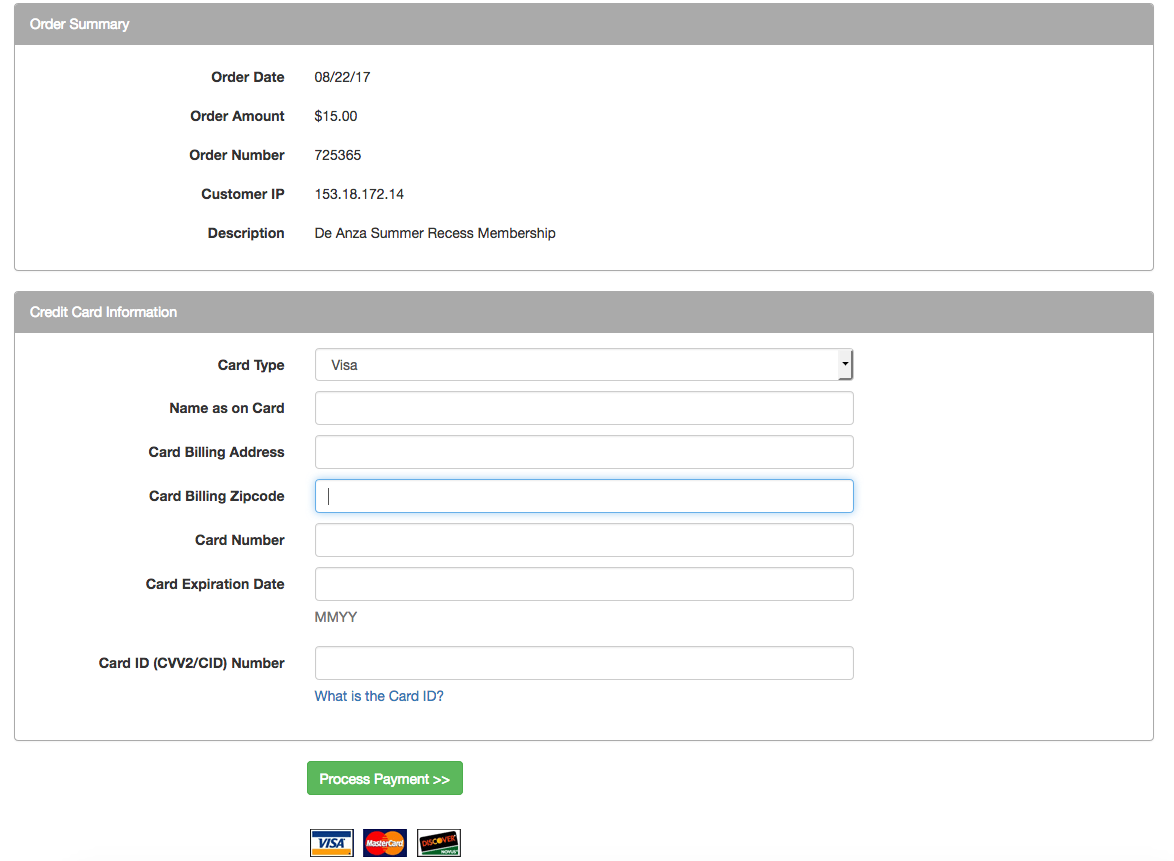
5) Checkout continues with Credit Card payment screen; enter pertinent data and then
click "Process Payment >>" to submit and finalize registration.
Congratulations, you are now signed up for the class! You will receive a confirmation and reciept, along with any additional information
you will need for the class via email. You only need to create a profile once, and
you will use the same process to register for every semester.

